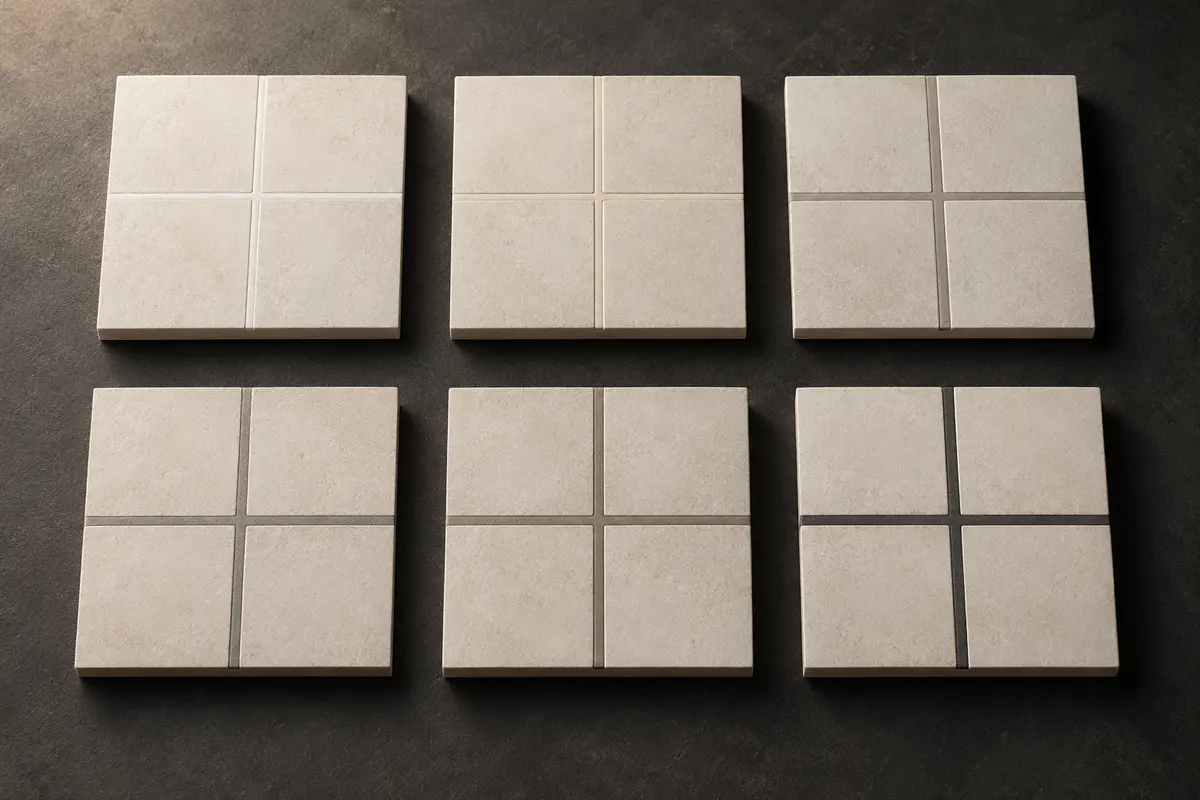
Grout colour changes the way a tiled surface is read. Before choosing a shade, decide what you want to notice first: the tile's shape, its pattern, its texture or the room as a whole. Then evaluate that idea against the actual tile, a compatible grout product and the surrounding finishes.
Choose the role of the joint
As a design starting point, a close colour match can make joints quieter, while greater contrast draws attention to the layout. CUSTOM's colour-selection guidance describes this difference between blending and accenting a tile pattern.
Use that distinction to make a short list rather than searching every colour available. You might compare one close match, one slightly contrasting option and one deliberate accent. Those are design directions, not specifications, until the required grout product is confirmed.
View the whole room
Place samples near the actual tile and include paint, cabinet finishes, flooring and fixtures in the view. Look at the selection during ordinary daytime and evening use.
For a backsplash, evaluate the colour from the doorway and at working distance. For a floor, stand back far enough to see the pattern rather than judging only one intersection. A colour that appeals as a small swatch may create a busier or quieter surface than you expected when repeated.
Use screens to explore, then approve a physical reference
Manufacturer charts and digital previews help narrow options. They should not be the sole approval for a final shade.
CUSTOM's colour selector explains that screens approximate the finish and that tile and job conditions can affect the installed appearance. Ask for a physical reference in the selected product, ideally a representative cured sample where practical. Record its name, colour code and which surface it applies to.
Decide how an existing repair should read
A repair does not always need to disappear, but its boundary should be intentional. Is the objective a modest patch, a consistent wall or a new colour throughout the room?
Ask whether a partial replacement is expected to remain visible beside existing grout. Consider whether a natural edge, threshold or complete surface would make a clearer stopping point. Do not assume an old colour name guarantees an invisible match after years of use or an earlier treatment.
If appearance is the main concern and the existing joints are suitable, MAPEI's Grout Refresh guidance describes a colourant alternative to removal. Its preparation requirements still apply; a colour treatment should not be used to hide deteriorating material.
Coordinate the connections
Include the colour and sheen of designated flexible joints when reviewing the scheme. Ask the installer to identify which corners and transitions receive a separate sealant and whether its proposed finish has been shown beside the grout.
Also review niches, benches, thresholds and changes in tile. A written surface-by-surface selection prevents one shorthand instruction, such as “use white everywhere,” from leaving important details unresolved.
Make maintenance and approval practical
Choose a colour you like, then ask how the actual grout and room should be maintained. A darker shade is not a maintenance plan, and a lighter one does not tell you whether a sealer is needed.
Before ordering, confirm product availability and the approved sample with the contractor. At handover, keep the exact product, colour code and care instructions together. If you later need a repair, this small record gives the next person a much stronger starting point than an image saved from a shopping screen.
HAUSE editorial · Reviewed 9 October 2026. Use the current regional instructions for the exact products and assembly.
- UltraCare Grout Refresh — product and manufacturer FAQs — MAPEI
- Grout Color Selector and selection guidance — CUSTOM Building Products